See the ElumTools blog for additional info!
The obvious answer to this question is “it depends on the application,” and every lighting professional can expound on the topic at length. However, in the case of ElumTools in Revit, the answer takes on a slightly more critical edge, as it is very easy to make mistakes that can produce unexpected results.
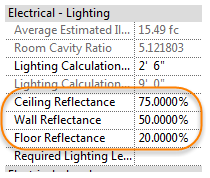
Here is the problem: ElumTools derives all surface reflectances from the material map (ElumTools ribbon, Material Mapping). ElumTools does NOT use the Revit values in Electrical Settings for the Space (shown below). This is a common misconception for beginning users.
When designing ElumTools, we wanted the ability to associate reflectance as closely as possible with the actual material color for more accurate computations. The Revit API provides an easy avenue and allows ElumTools to see a material’s “Graphics Color”. From this color, we can calculate reflectance as shown below, where R, G and B are the percent contributions of the red, green and blue pixels, respectively.

Unfortunately, this approach assumes that the Graphics Color of the material is true to its actual color. This may not be the case. Therefore, ElumTools provides the very import material mapping interface to allow changes. The obvious downside: if the user does not carefully map the materials by inspecting the reflectances that have been calculated from the Revit material colors, the lighting calculations will not be as expected.
In the case of linked architectural models, this problem can be exaggerated. Many of the materials are set in the architect’s model and are often not easy to associate with Room or Space surfaces, as the linked model elements are not selectable in the host model. The linked model materials and their calculated reflectances are available from the drop down menu at the top of the Material Mapping dialog (shown below).
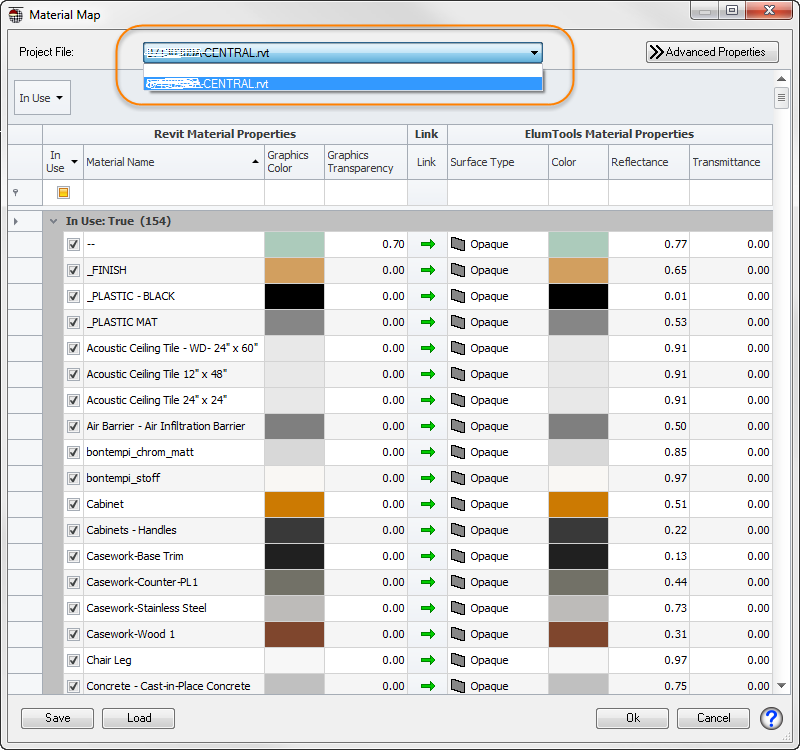
It is extremely important that you make sure that ALL material reflectances are what you want for lighting calculations, in all models, by setting the value for each relevant material as shown below. It is typical that you will have to change, at minimum, the ceiling tile, carpet and wall color.
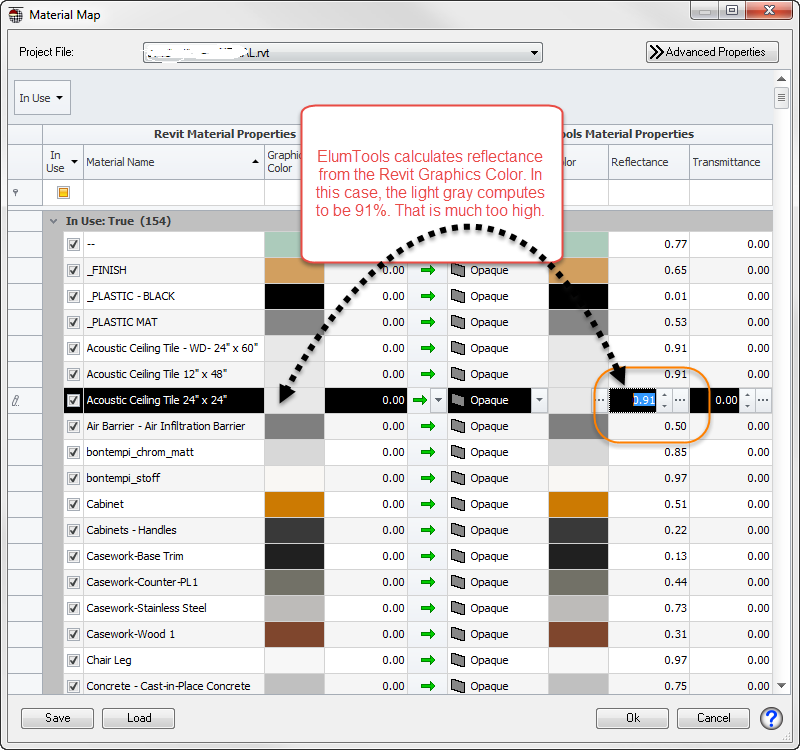
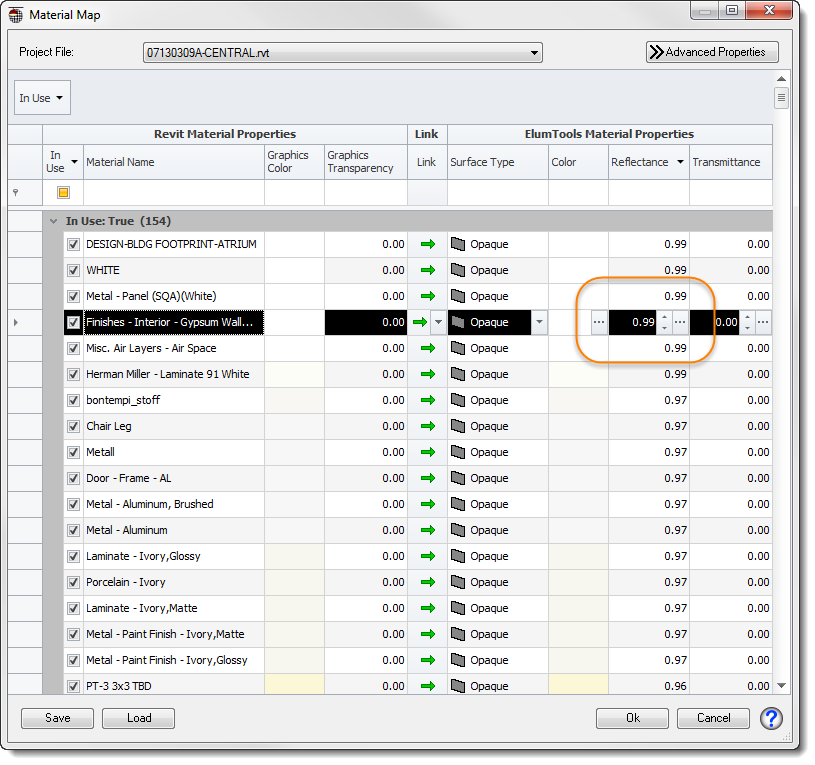
Let’s look at a case where extra diligence is required. Imagine the Revit Graphics color for a material is white. Examine the material map in the next screen capture: this is exactly the case. ElumTools will internally not allow 100% reflectance, so it is set to 99%.
There is an easy way to sort the materials list in ElumTools to expose ALL of the highest reflectance materials. Sort the reflectance column by clicking on the top of the column. In the file shown there are several materials with 99% reflectance (white material). This is quite an interesting problem, as it allows light to continue bouncing around the environment almost infinitely. Only 1% of the light is absorbed on each bounce. It is also highly unlikely that the material’s reflectance is actually that high.
When computing the results for a model with such high reflectance surfaces, the calculation engine will grind away for much longer than normally experienced, as light continues to bounce from surface to surface. Eventually the process reaches convergence, but as you might guess, the light levels are much higher than anticipated!
Here are a couple of tips to improve the process:
- Take the time to assign accurate reflectances to the important materials (ceiling, walls, floor) and then SAVE the materials map to be used with any project. This works nicely if the materials in your architectural models tend to be the same or similar. The Save and Load buttons are in the lower left corner of the Material Mapping dialog.
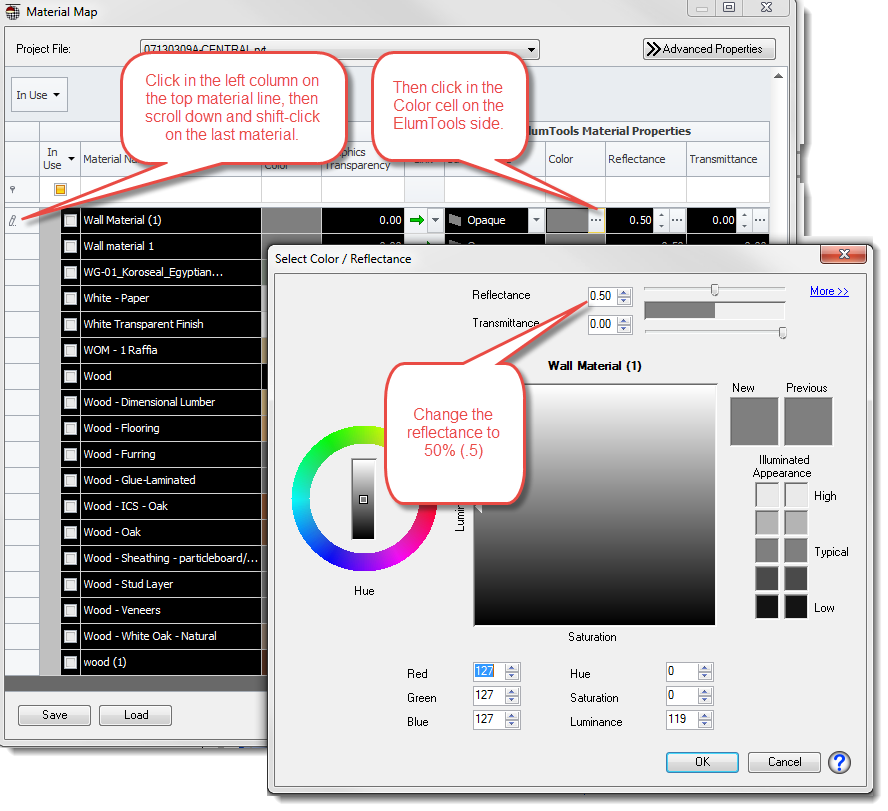
- Alternatively, group selected materials and assign them a single reflectance. For example: Shift-select all materials and assign them a reflectance of 50% as shown below. Then locate your ceiling and floor materials and reassign them to 80% and 20%, or your preference.
The bottom line: if you set your materials correctly, your lighting calculations will be accurate and as expected!